How can you reach a wider audience and increase sales? Try shipping internationally! Your products are amazing, and more customers should see what your business has to offer. International shipping may require a slightly different shipping process than domestic shipping. However, international shipping is a way to boost sales, and we’ll show you the steps needed to create an international shipping process.
1) Check for international shipping restrictions
Much like domestic shipping, international shipping comes with a set of restrictions and guidelines. International shipping restrictions may vary from carrier to carrier and by whether your shipment will be traveling by air or ground-based carrier services. Each carrier’s shipping restrictions can be found on their website. For more information about international shipping restrictions, contact your carrier directly.
Once you’ve reviewed the international shipping restrictions applicable to the products your business ships, communicate these guidelines with customers. Explaining international shipping limitations to your customers during the checkout process will create a more pleasant shipping experience. Also, knowing international shipping restrictions keeps shipments from being returned and/or your business from receiving penalties.
2) Decide how taxes and duties will be paid
Before we talk about paying taxes and duties, let’s discuss the difference between the two. Duties are additional costs given to specific products as they enter specific countries. Duties are imposed on items that can compete with items created within the country. For example, if you’re shipping coffee to a country known for selling coffee, especially at a higher price, the duties added will be greater for this product. Taxes are given to a product based on its overall cost and the amount of taxes on a product will vary from country to country.
If you’re shipping to the UK or the EU, customs forms will need VAT (Value Added Tax) and IOSS (Import One-Stop-Shop) numbers. VAT is determined by a product’s cost, minus any components of the product that have already been taxed. IOSS is a business-specific number given by your store of marketplace and choice. IOSS gives your business the opportunity to pay VAT instead of having the financial responsibility fall on your customers when their package is delivered. VAT and IOSS numbers are tax ID numbers and help determine:
- How the taxes and duties will be calculated
- When the taxes and duties will be paid in the shipping process
- Who will pay or has paid the taxes and duties
3) Familiarize yourself with customs forms
Customs forms are additional pieces of documentation attached to your shipments. These forms can be physically or electronically submitted, depending on the carrier used. Customs forms include information about the content of your package and help your shipment move through customs offices faster.
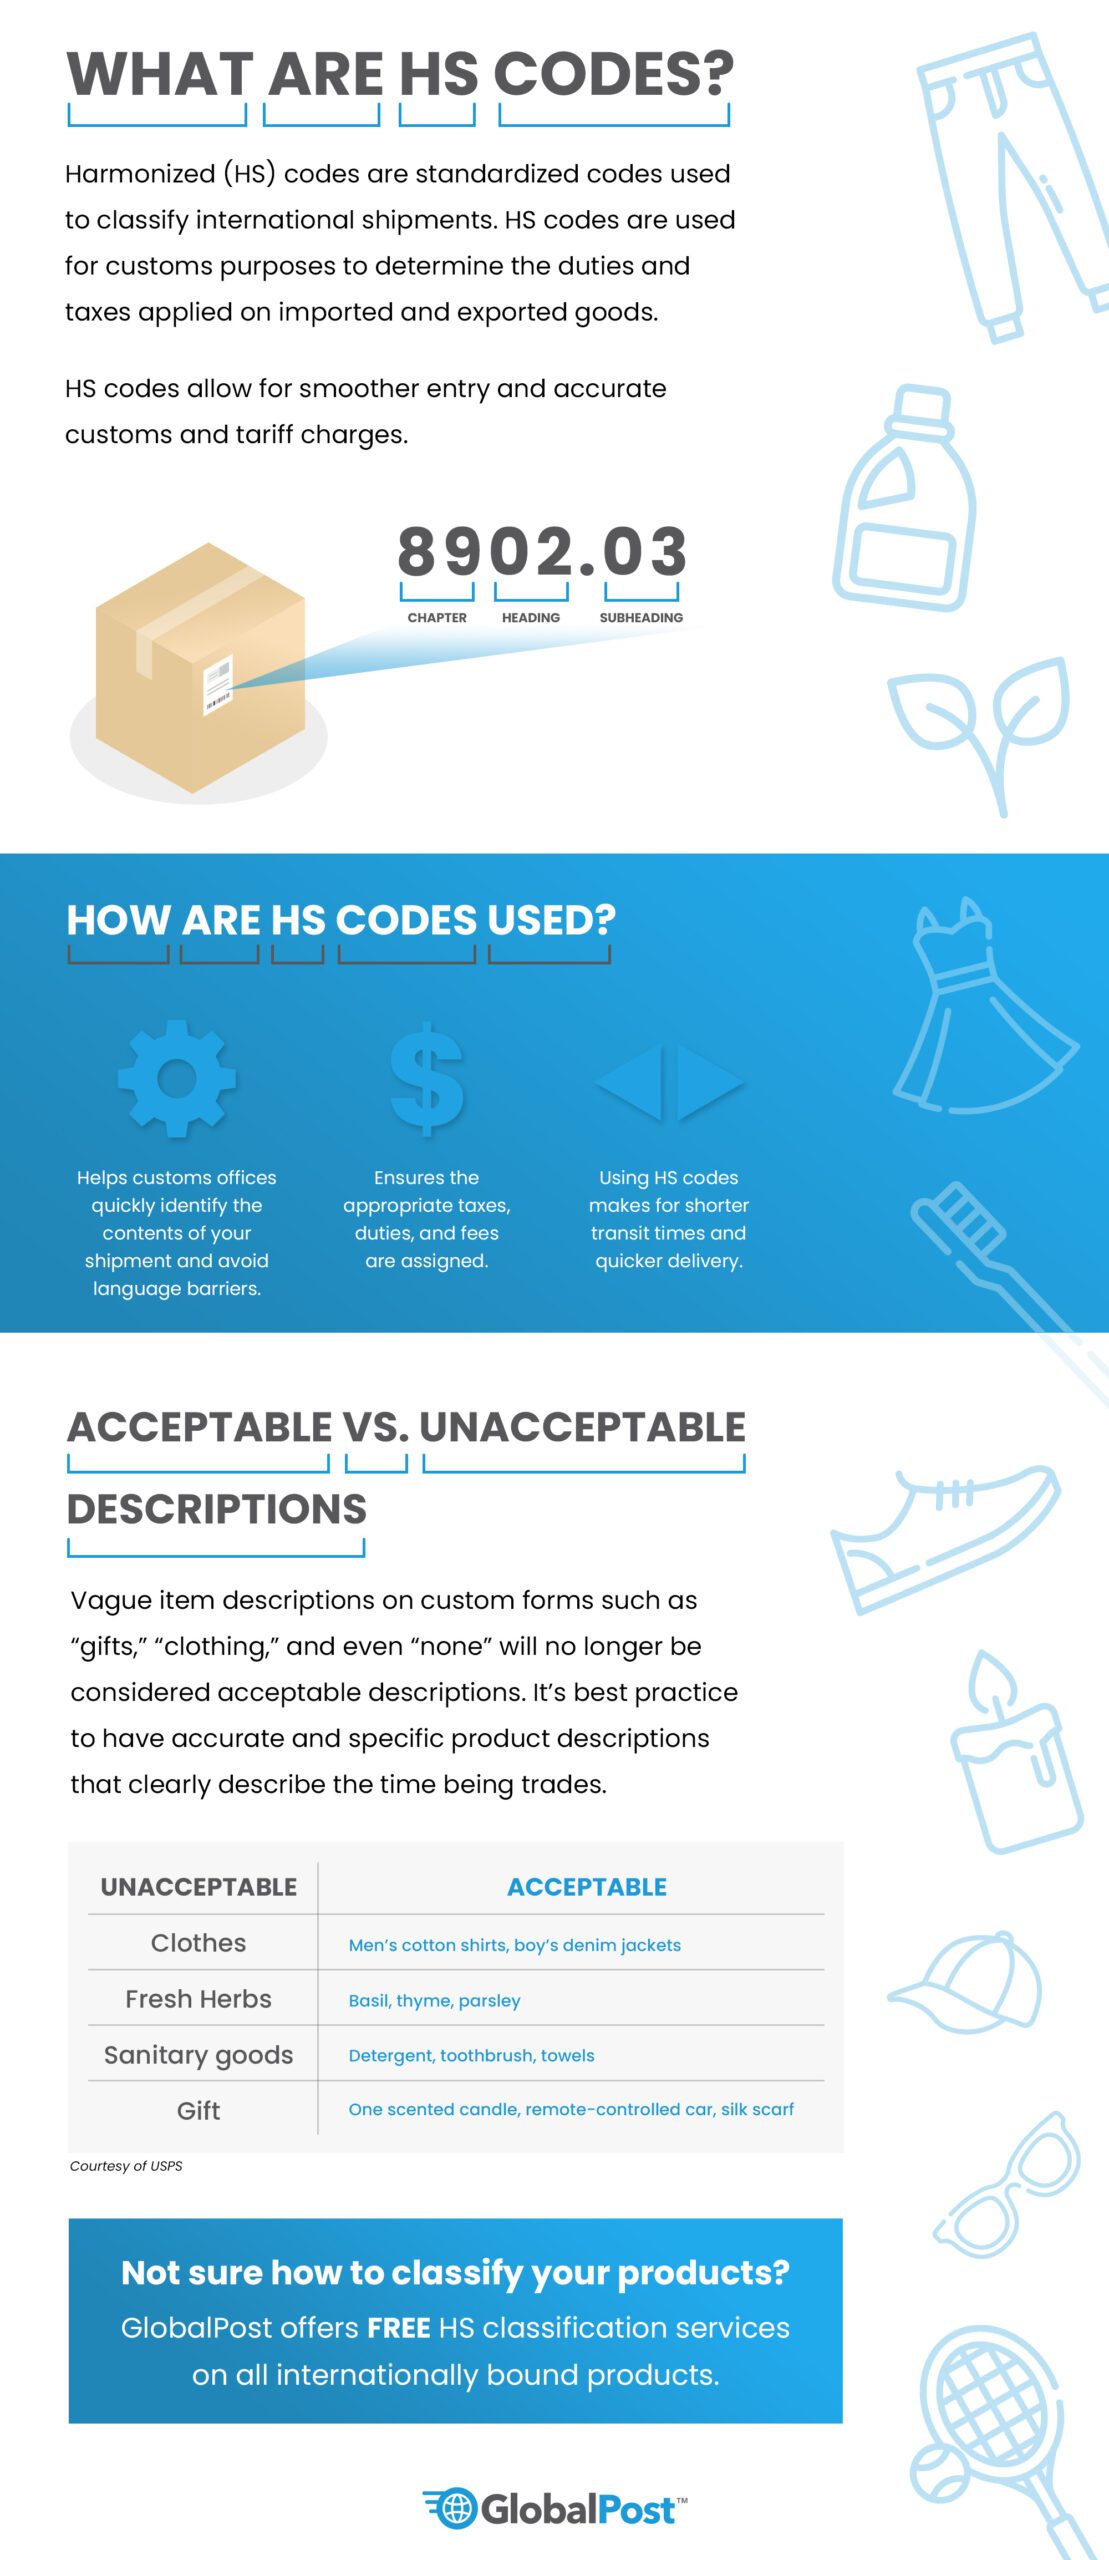
As we mentioned earlier, packages headed to the UK or the EU will need VAT (Value Added Tax) and IOSS (Import One-Stop-Shop) numbers on the customs forms. Additionally, shipments passing through or going directly to most countries in the EU will be required to have Harmonized or HS codes. HS codes are six-digit codes used to represent a product and its attributes. HS codes are also universal, so assigning them to products helps to bypass potential language barriers.
Note: Shipments to Puerto Rico and military addresses are considered domestic shipments but will need customs forms.
4) Utilize international carriers like GlobalPost
Our partner carrier, GlobalPost, provides merchants with an efficient international carrier service. GlobalPost works with carriers across the globe to decrease shipping delays and get packages to your customers safely. When using their GlobalPost Standard International service, you can expect:
- Door-to-door tracking
- Up to $100 in parcel coverage for loss and damages, including the shipping cost
- On Demand HS Classification Tool for up to five daily searches
- Free HS Code Fulfillment Service that allocates the right tariff code to your parcels
- No customs forms to print
5) Create an international shipping label with Stamps.com Online
Click the Mail tab on your dashboard.
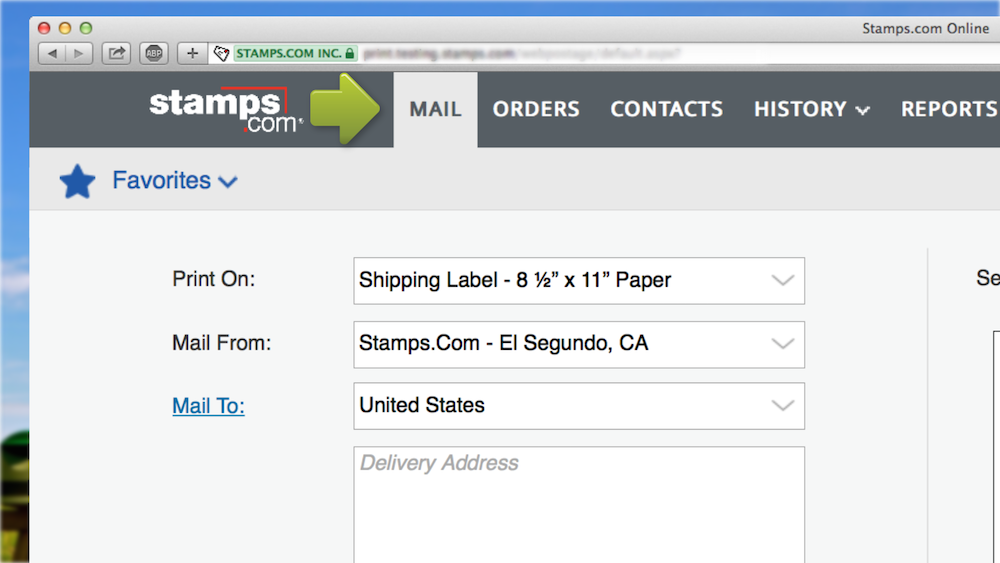
Select your label/paper size from the Print On drop-down menu.
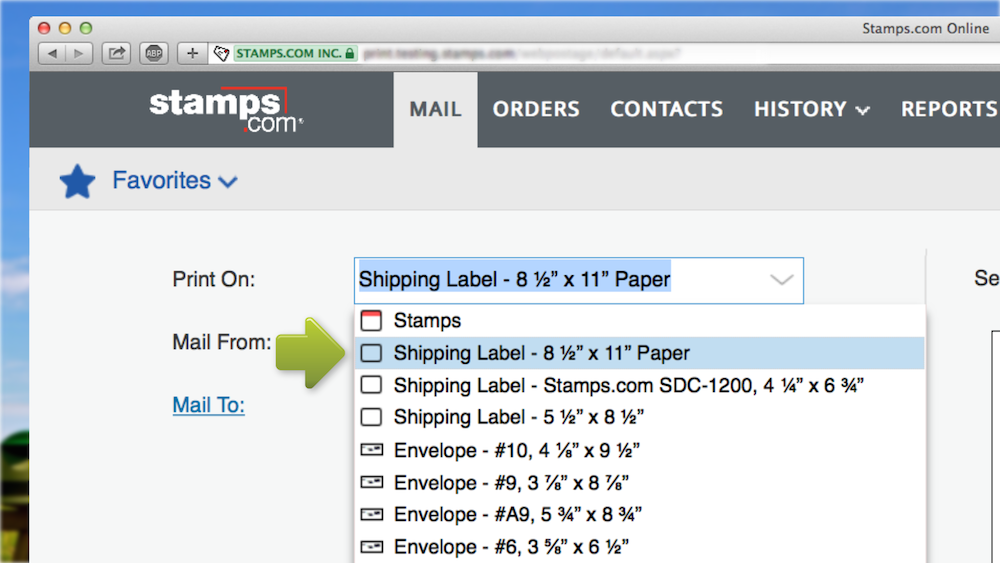
Use the Mail To drop-down menu to choose the destination.
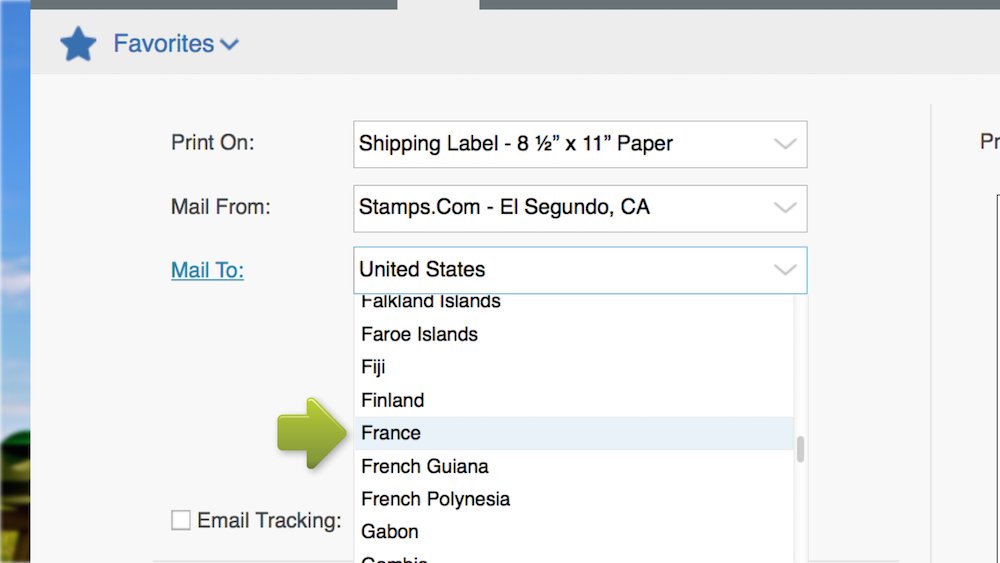
Enter the recipient’s address manually or from your Stamps.com Contacts list.
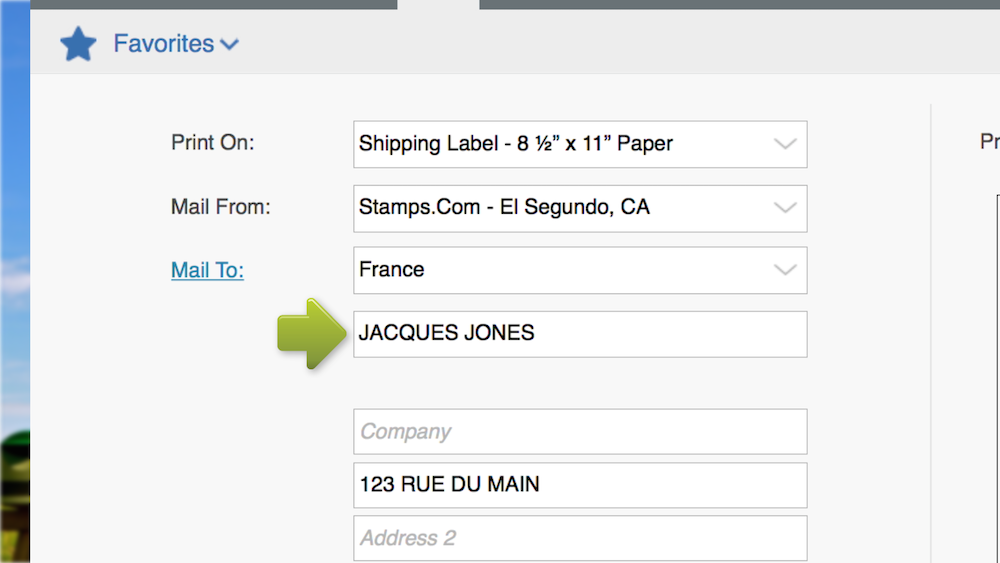
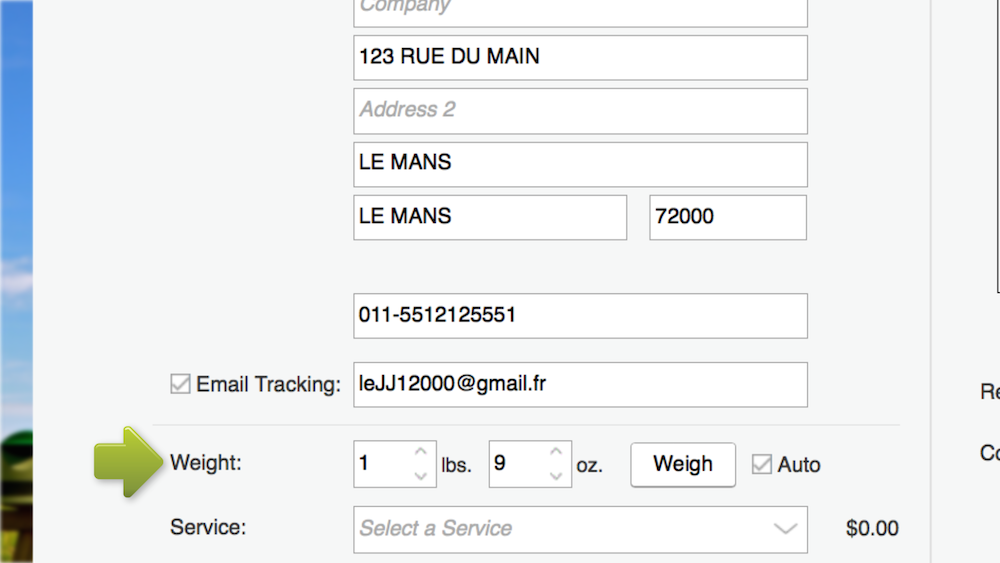
Weigh your shipping materials. If using your connected Stamps.com Postal Scale, the package’s weight will show automatically.* Then weigh each individual item within your box. You’ll need these weights for the customs forms later on.
*Note: Confirm the Auto box next to your item’s displayed weight is checked.
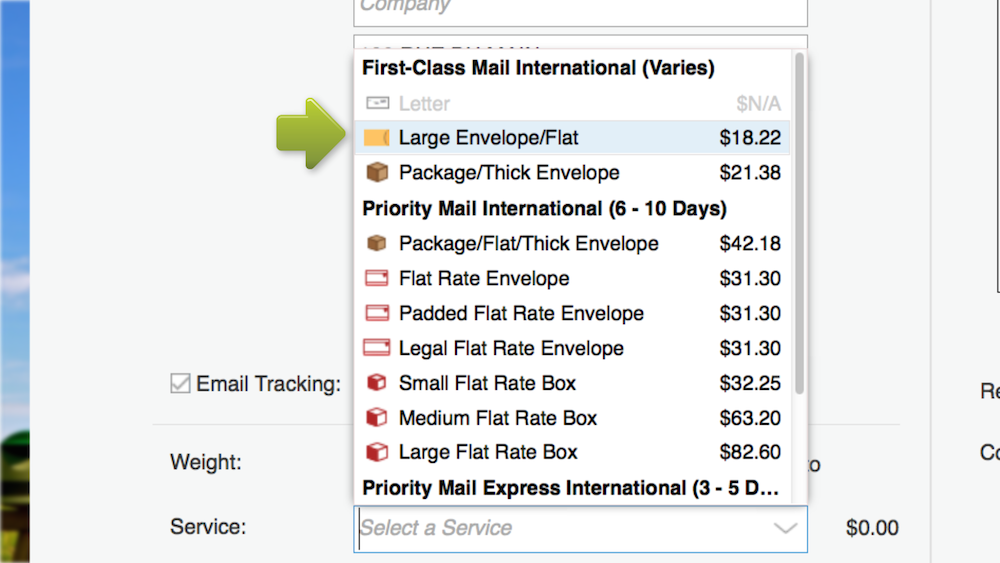
Pick a USPS international service option from the Service drop-down menu. Only options available to the destination country will be shown.
Purchase additional insurance, especially for high-value packages.
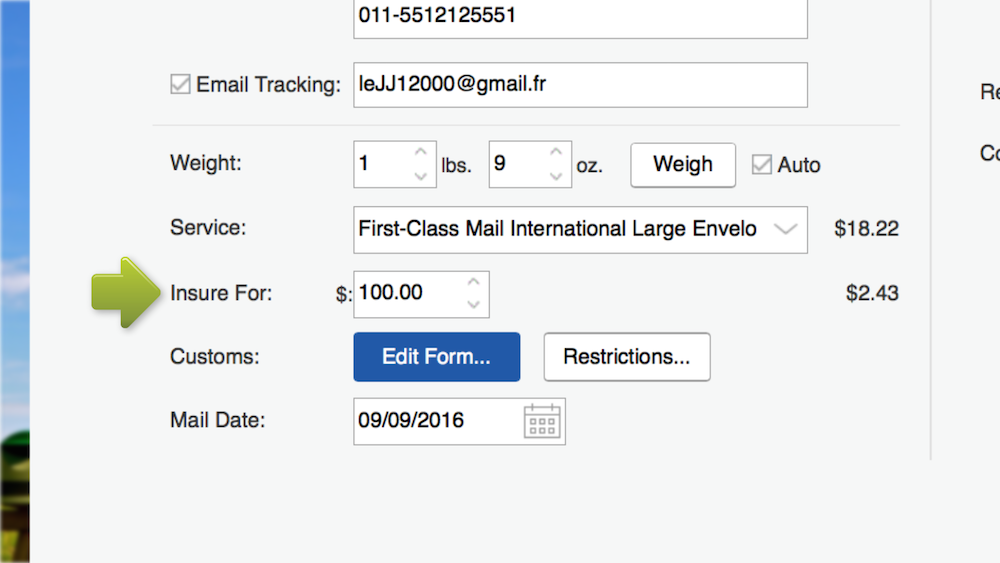
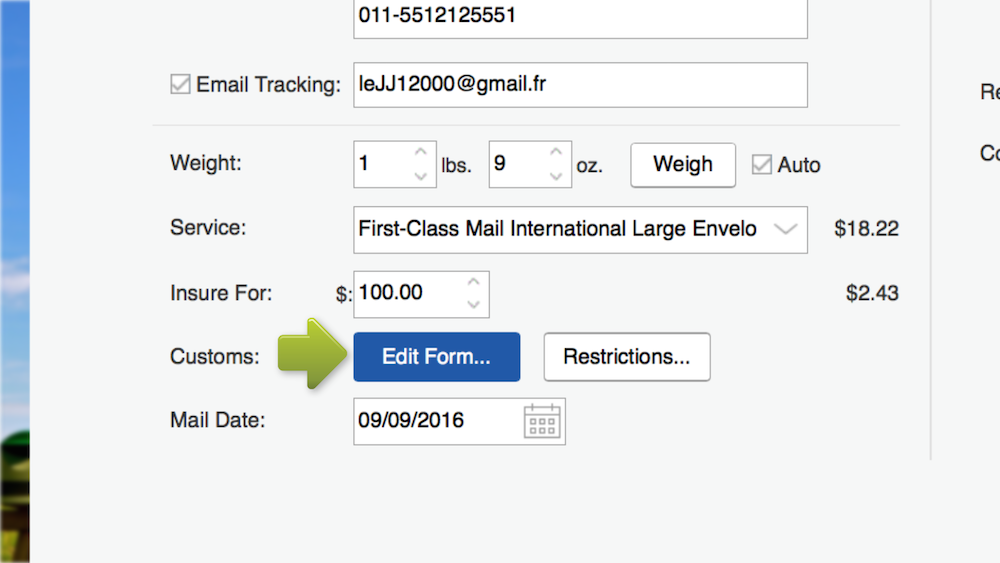
Click Edit Form in the Customs section.
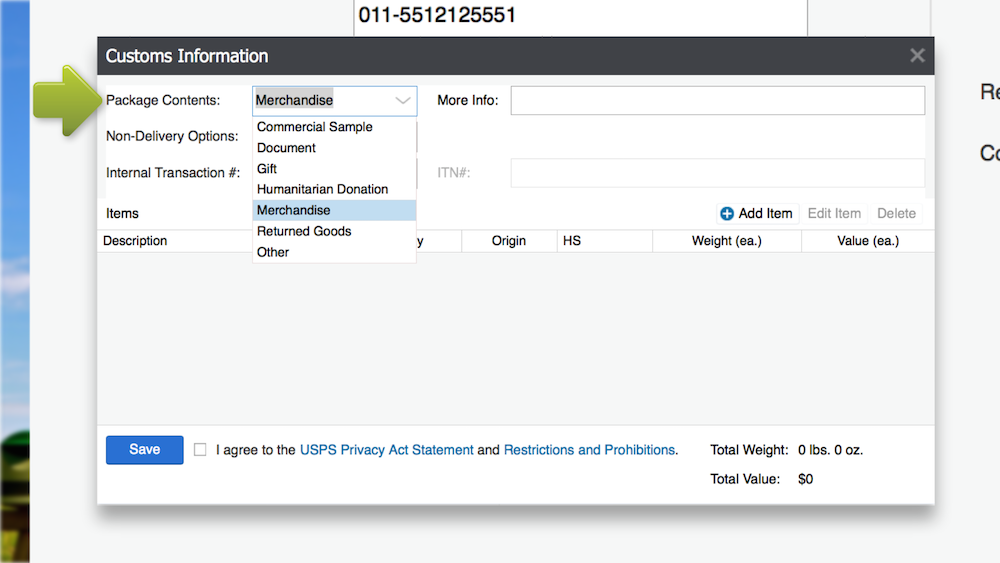
Select the best description for the items you’re shipping from the Package Contents menu.
Click the Non-Delivery Options menu and select your preference.
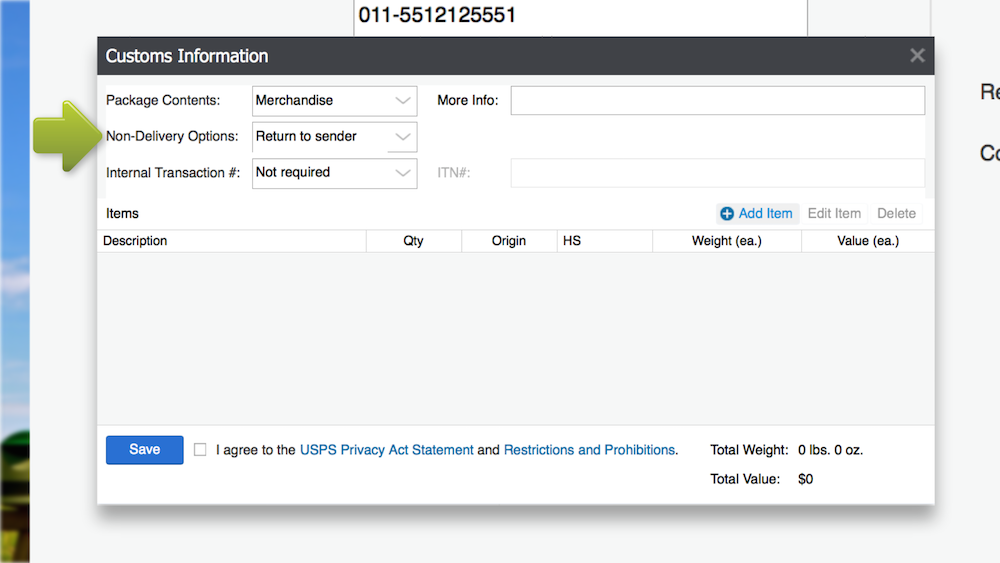
Enter an International Transaction # if applicable.
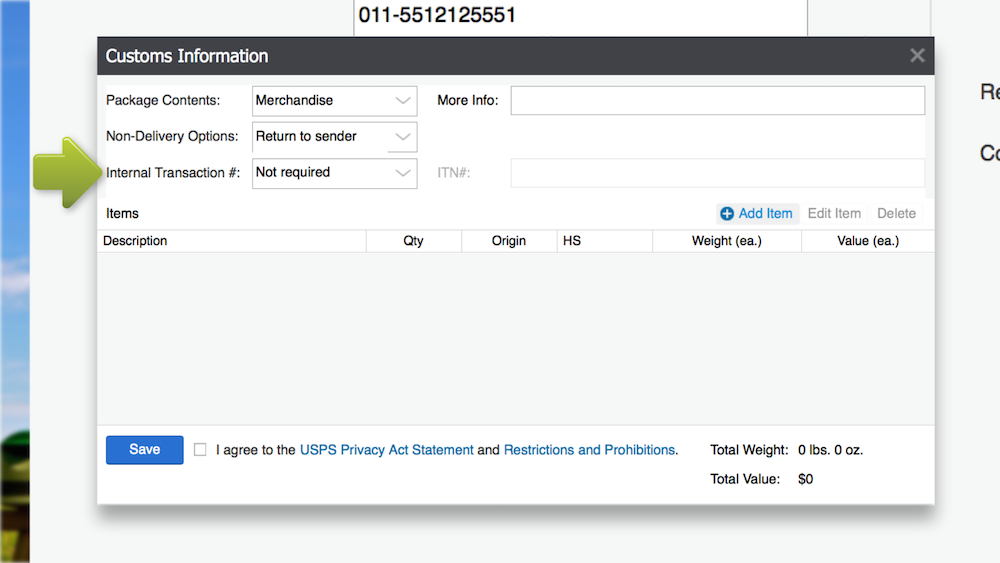
Select the Add Item option.
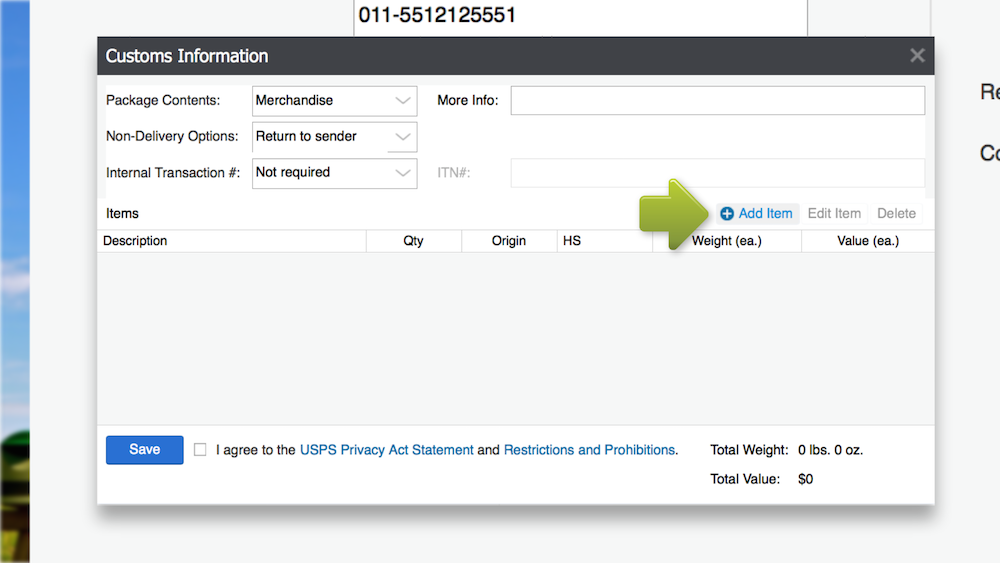
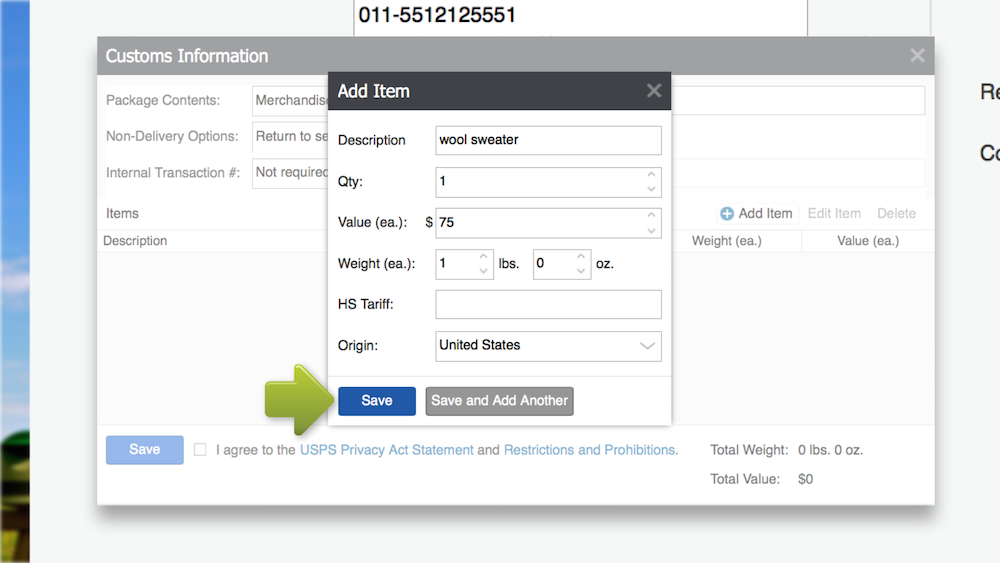
Here, you’ll add your product’s description, the quantity of the item, as well as the item’s weight and value. You’ll repeat this process for each item in the package. If you need to add a description, remember to be specific for shipments traveling through or to the EU. Avoid general descriptions like “clothing” or “electronics.” Shipments through and to the EU will also need HS codes added. A complete list of customs requirements for each USPS mail class can be found in our Learning Center.
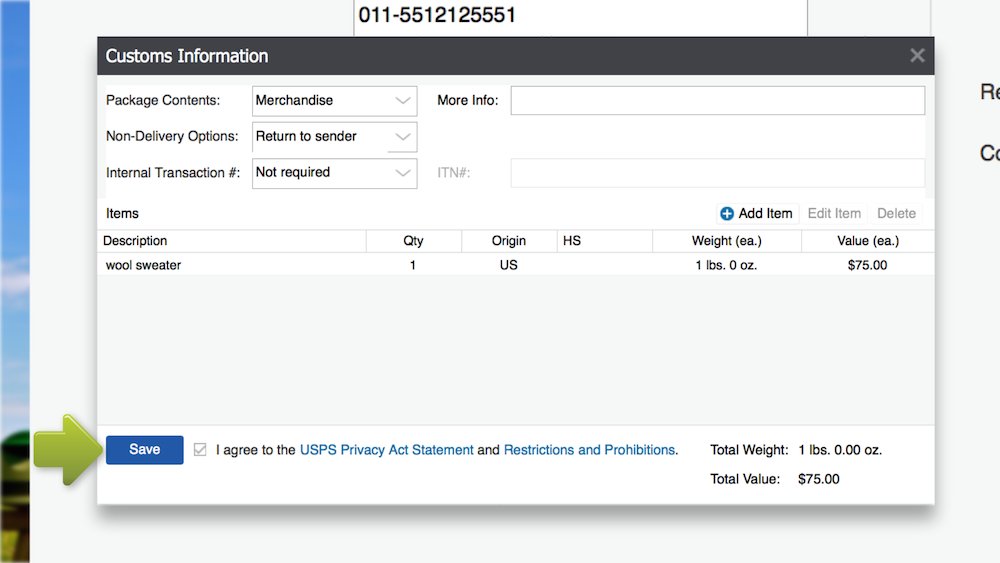
Agree to the USPS Privacy Act Statement and Restrictions and Prohibitions and click Save.
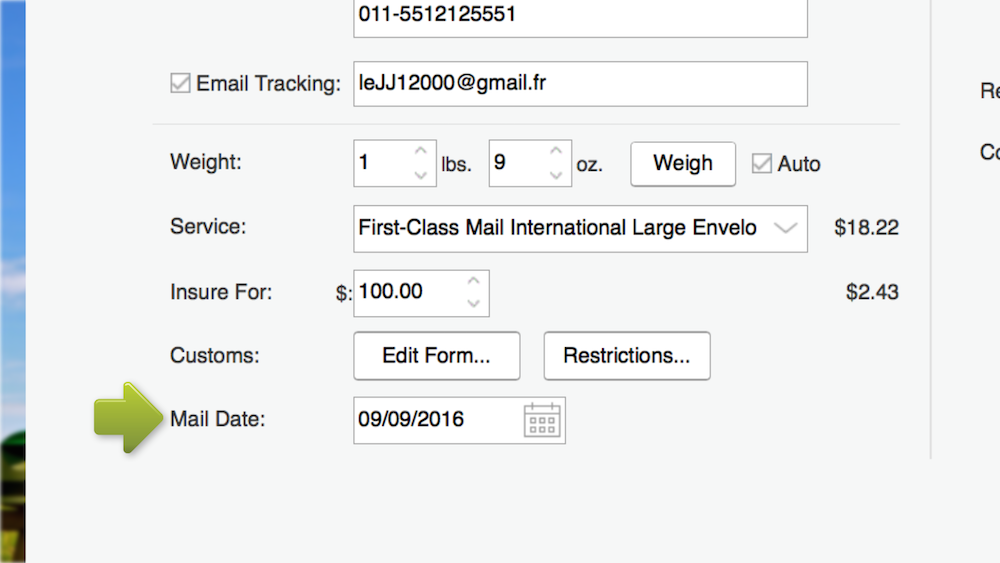
Edit your international shipment’s mail date if the package will not be shipped on the same day the label is created.
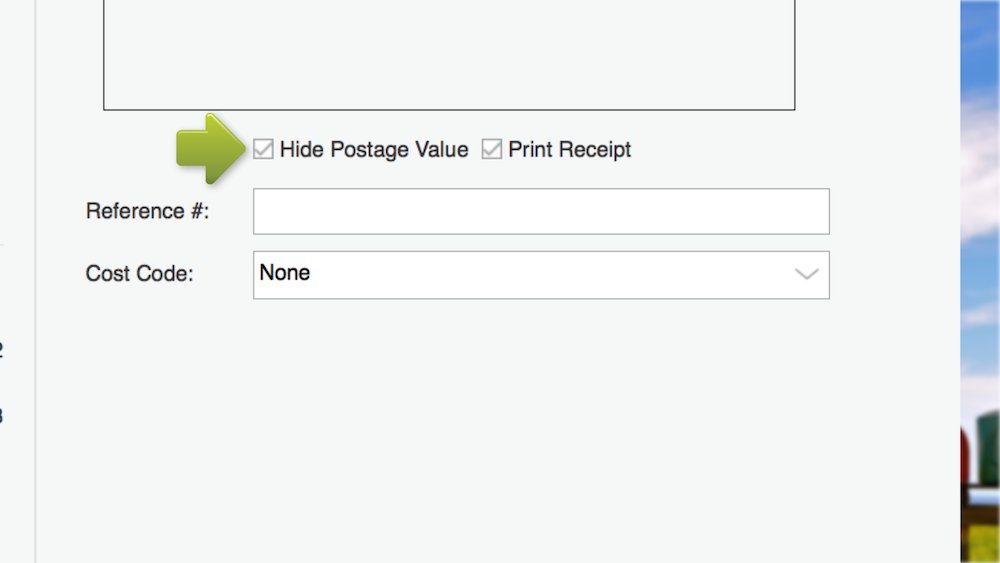
Leave the Hide Postage Value box checked.
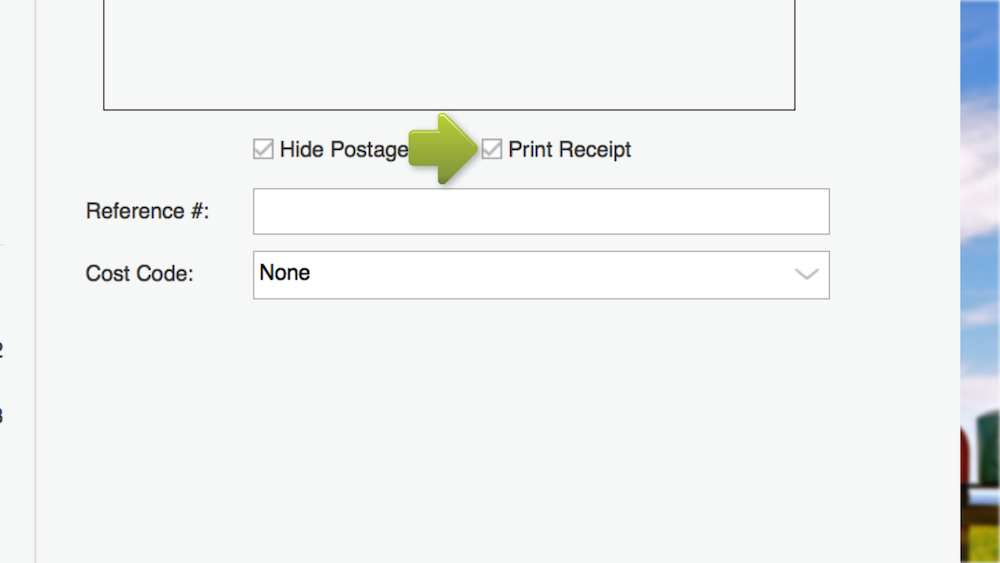
Select Print Receipt if you’d like a printed copy of your receipt when your label is printed.
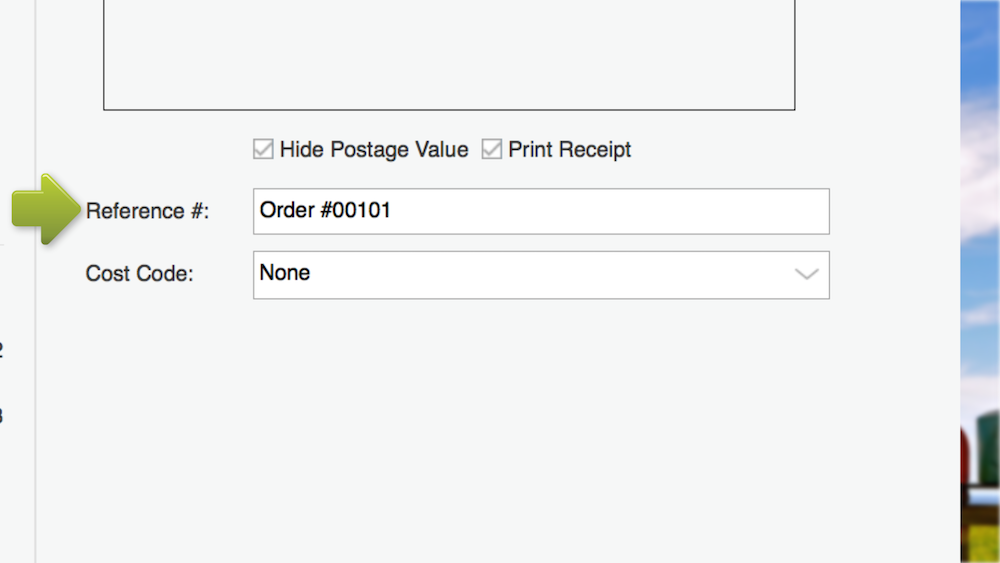
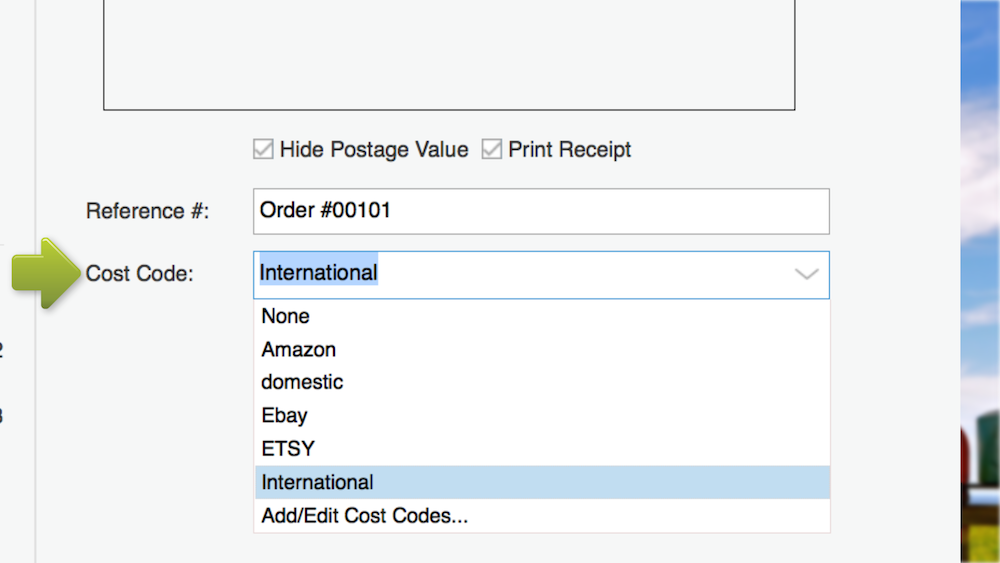
Create a Reference Number for the Stamps.com Print History files.
Select or create a cost code as needed.
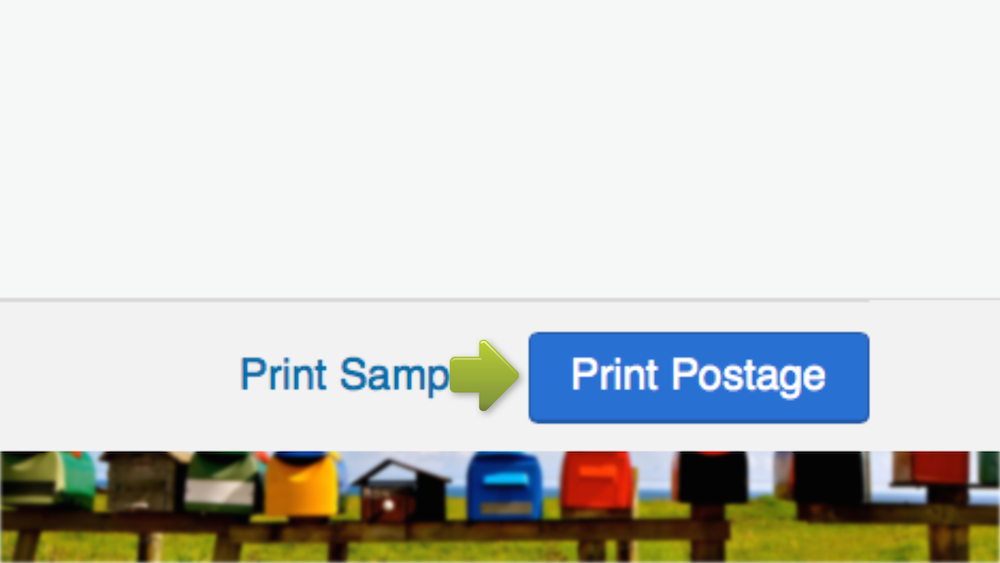
For new merchants, we recommend printing a sample first. Once you’ve confirmed the test print is correct, hit Print Postage.
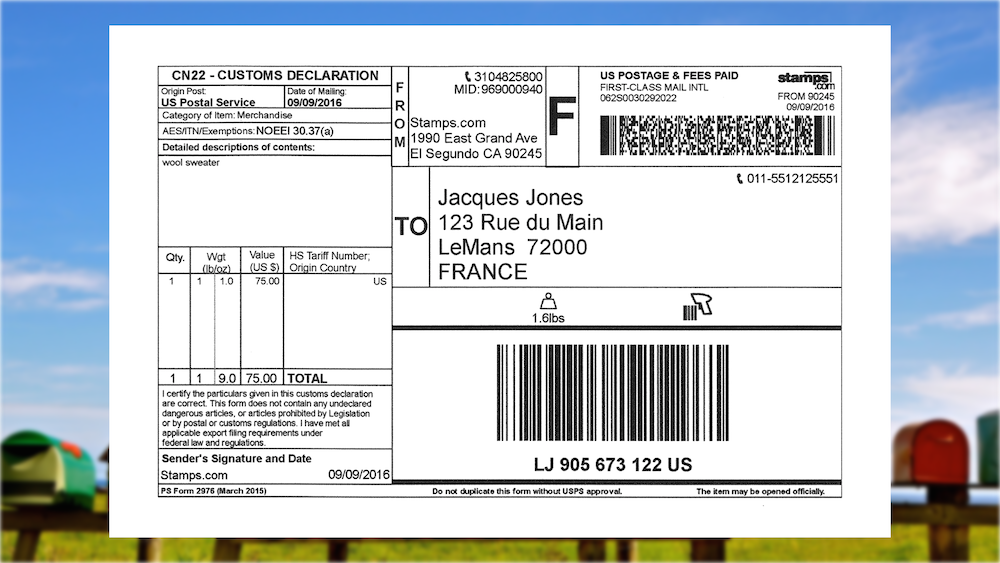
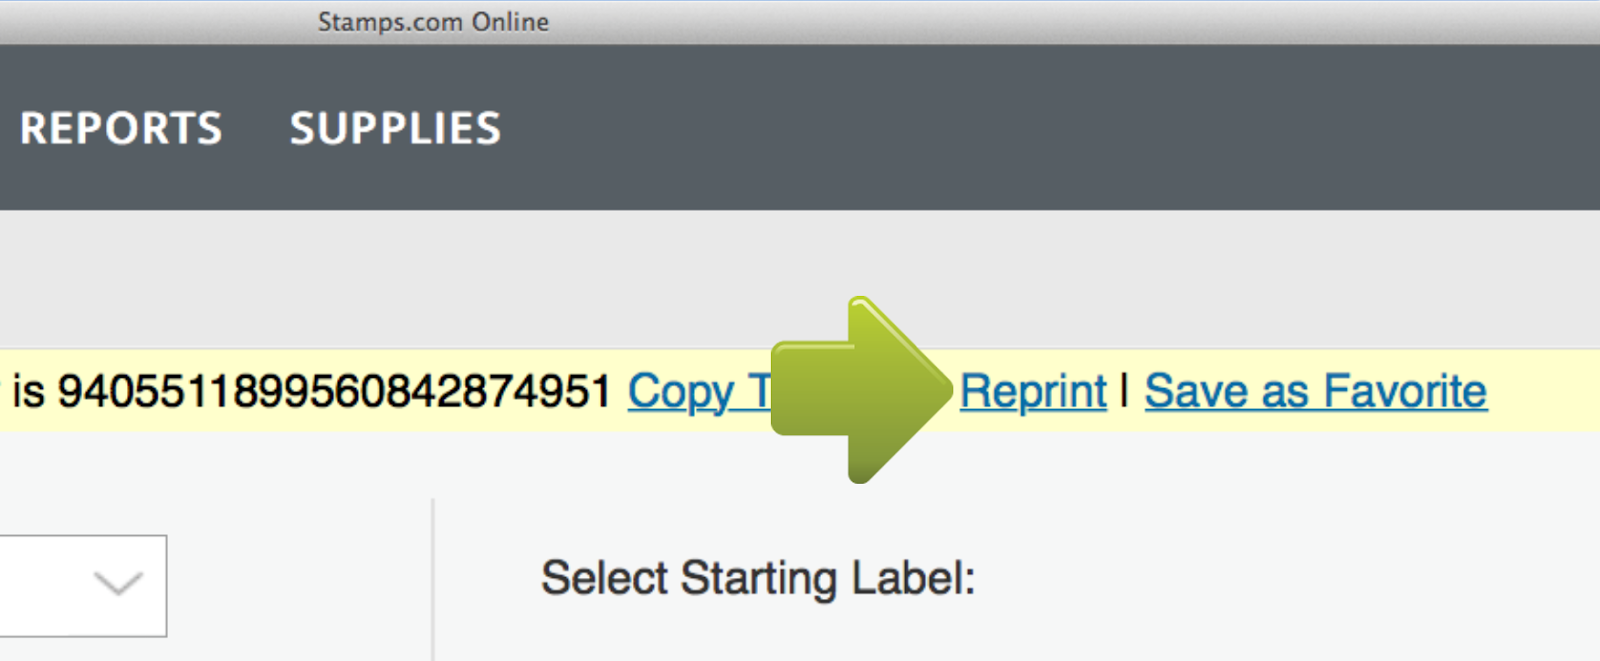
If you notice incorrect information on your label after printing, click the Reprint button on your screen. One big thing to note is you’ll have one opportunity to reprint.
For instructions on creating an international label through Stamps.com’s PC Software, visit our Learning Center.
Conclusion
You’ve learned how to evade negative shopping experiences for your customers by communicating shipping restrictions. You understand how to complete customs forms and decrease the chance of shipping delays. You’ve found international shipping options with carriers like GlobalPost and walked through creating international labels on Stamps.com. Now, you’re officially ready to open your store to global customers!


